🏠 Basement Waterproofing: How and Why to Transform Your Space
Welcome to the ultimate guide to
basement waterproofing — your roadmap to transforming one of your home’s most overlooked spaces into a dry, healthy, and valuable part of your property.
Whether you’re a hands-on DIY enthusiast or considering hiring a professional contractor like
FLC Energy, this article will walk you through every key step: assessing your basement, choosing the right waterproofing strategy, and ensuring long-term moisture control.
Grab your hard hat and let’s get started.
🔍 Step 1: Assess Your Basement’s Scope of Work
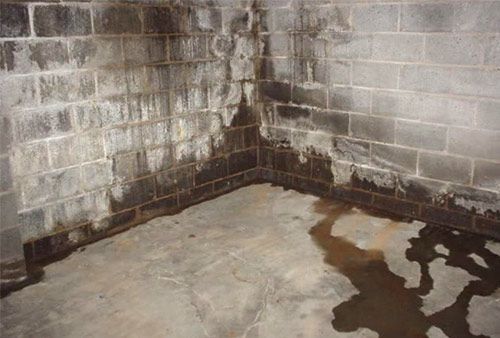
Before breaking ground (literally), take time to
evaluate your basement’s condition.
Ask yourself:
- Is your basement prone to occasional flooding, persistent dampness, or both?
- Do you notice musty odors, mold, or discoloration on walls or floors?
- Are there framed-out or finished sections to protect during the process?
- How about plumbing, HVAC, or electrical utilities that could impact installation?
Understanding these factors helps determine the right solution — whether that’s a
French drain system,
vapor barrier,
sump pump installation, or a combination of approaches.
🌧️ Step 2: Start Outside — Exterior Waterproofing Solutions
The fight against water often begins
outside your home. By addressing external factors first, you can significantly reduce the load on your interior waterproofing systems.
Here’s what to check:
- Gutters & Downspouts: Keep them clear of debris and ensure they direct water at least
10 feet away from your foundation.
- Grading: The soil should slope
away from your home, not toward it. Poor grading allows rainwater to pool near basement walls.
- Foundation Cracks: Seal visible cracks to prevent surface water intrusion.
Fixing these exterior issues early can prevent many interior headaches later.
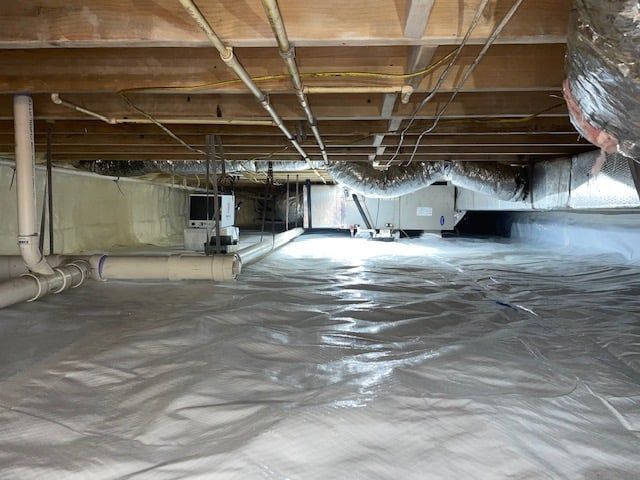
🧱 Step 3: Interior Waterproofing Strategies
Once the exterior is optimized, it’s time to tackle the
interior defenses.
If your basement experiences consistent moisture or flooding, you may need to install an
interior French drain system. This involves breaking up concrete along the perimeter, excavating a shallow trench, and installing perforated piping that slopes toward a
sump pit.
If your foundation includes multiple corners, columns, or irregular areas, the system may need to be sectioned for efficient water flow.
Once installed, water that enters through the foundation will be collected by the drain and removed by the
sump pump, keeping your basement dry year-round.
👉
Related:
Should I Install a Sump Pump? Essential Components for a Dry Basement or Crawlspace
⚡ Step 4: Electrical & Safety Considerations
Waterproofing systems often involve
electrical components, especially sump pumps and dehumidifiers. Always hire a
licensed electrician to handle:
- Wiring and grounding
- Installation of
GFCI outlets for moisture-prone areas
- Backup power options for your sump pump (so it works during power outages)
If you plan to finish your basement, this is also the perfect time to upgrade
lighting — recessed LEDs or track lighting can brighten the space while keeping it energy-efficient.
🧰 Step 5: Material Logistics & Planning
Basement waterproofing can be labor-intensive, so plan your
workflow and material movement carefully.
Tips:
- Clear out belongings before starting.
- Designate a staging area for tools and supplies.
- Rent proper equipment — jackhammers, wheelbarrows, and pumps.
- Label materials and organize them in order of installation.
Smart logistics reduce downtime and make the job (or jobsite) more efficient — whether you’re DIYing or managing a crew.
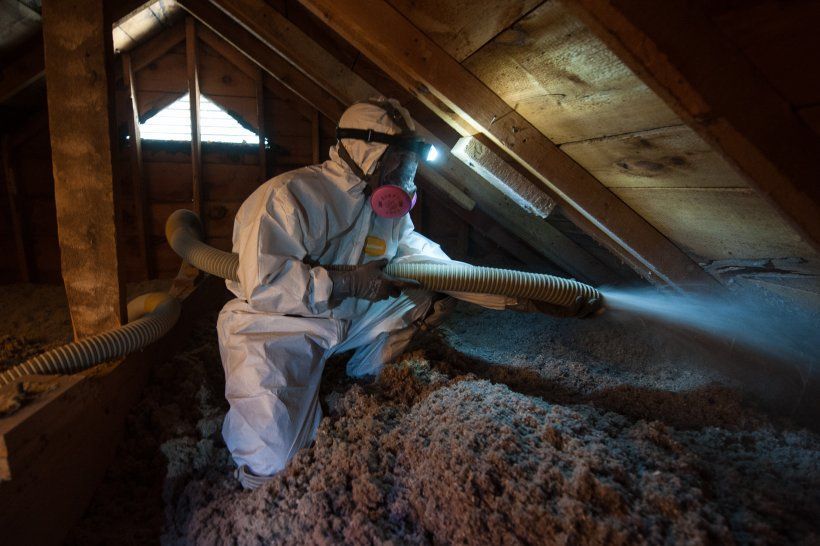
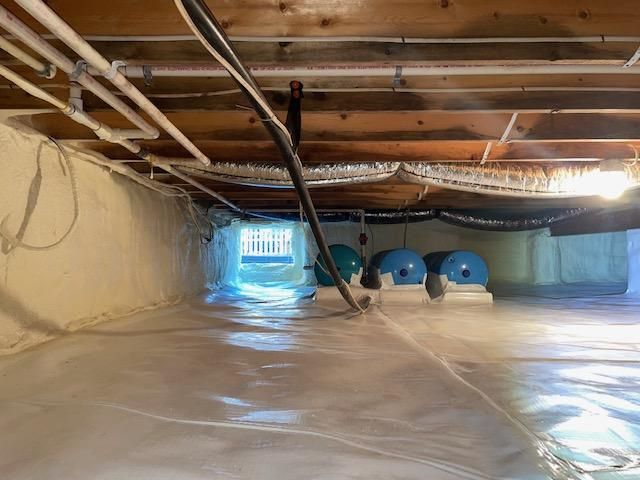
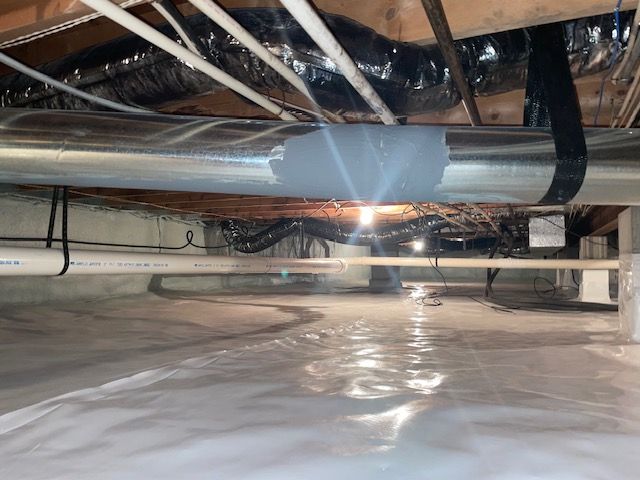
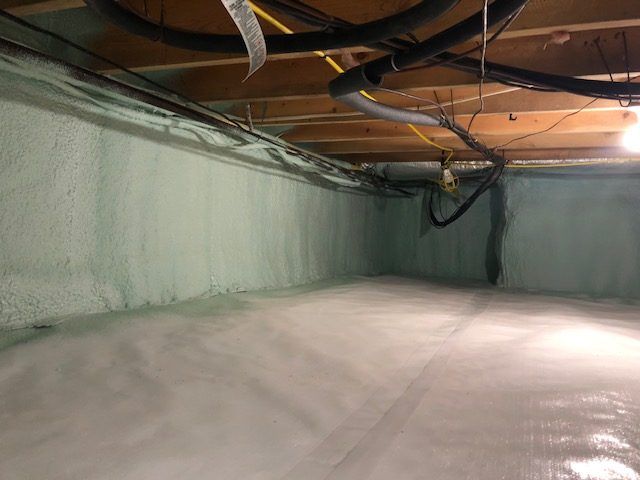
💨 Step 6: Moisture Control & Indoor Air Quality
Stopping water is step one —
controlling humidity and air quality is what makes a basement livable.
Consider:
- Wall Sealing: Use dimple board, spray foam, or waterproof coatings to prevent vapor intrusion.
- Sill Plate & Rim Joist Sealing: Apply spray foam or caulk where the foundation meets the framing to block air and moisture leaks.
- Dehumidifier Installation: A crawlspace or basement-rated dehumidifier keeps relative humidity around
50%, reducing mold growth and musty odors.
⚠️
Important: If you have a major water intrusion issue, don’t trap water behind your wall system. This can cause structural damage, mortar decay, and even wall collapse in extreme cases. A professional assessment from
FLC Energy ensures the right materials are used for your foundation type.
👉
Related:
Crawlspace Duct Sealing: Comfort, Health & Efficiency
🛠️ Step 7: DIY or Hire a Pro?
Basement waterproofing can be a rewarding DIY project — but it’s also
complex, messy, and physically demanding.
If your basement only needs minor improvements (like sealing cracks or regrading), DIY might make sense. But if your space needs:
- A full French drain or sump pump system
- Structural wall sealing or vapor barriers
- Professional-grade dehumidification or encapsulation
…then it’s best to work with an experienced contractor like
FLC Energy.
We provide
custom waterproofing solutions throughout Maryland and Delaware, ensuring your home’s foundation stays dry, safe, and healthy — no matter what Mother Nature has planned.
📞 Ready to Waterproof Your Basement?
Whether you’re battling humidity, standing water, or foundation seepage,
FLC Energy can help design a complete waterproofing plan — from drainage and sump pump installation to humidity control and crawlspace encapsulation.
📞 Call
(410) 860-8410
or
schedule a consultation today to transform your basement into a clean, dry, and usable part of your home.
FLC Energy — Delmarva’s Home Performance Company
#CallFLC |
www.FLCGreenTeam.com